Recording Booth
Capture the perfect audio recording with seamless integration into your workflows
With Recording Booth, you can capture a voice or audio recording, ready to use for voice cloning or as another type of audio asset (such as a sound effect or background music).
How to Capture a Voice Recording
To record your voice, simply press the record button to record right away!
If you have a simple recording set up, such as a mobile phone or a laptop with no external microphone, you should see a signal begin to appear straight away - this means that your audio is being captured.
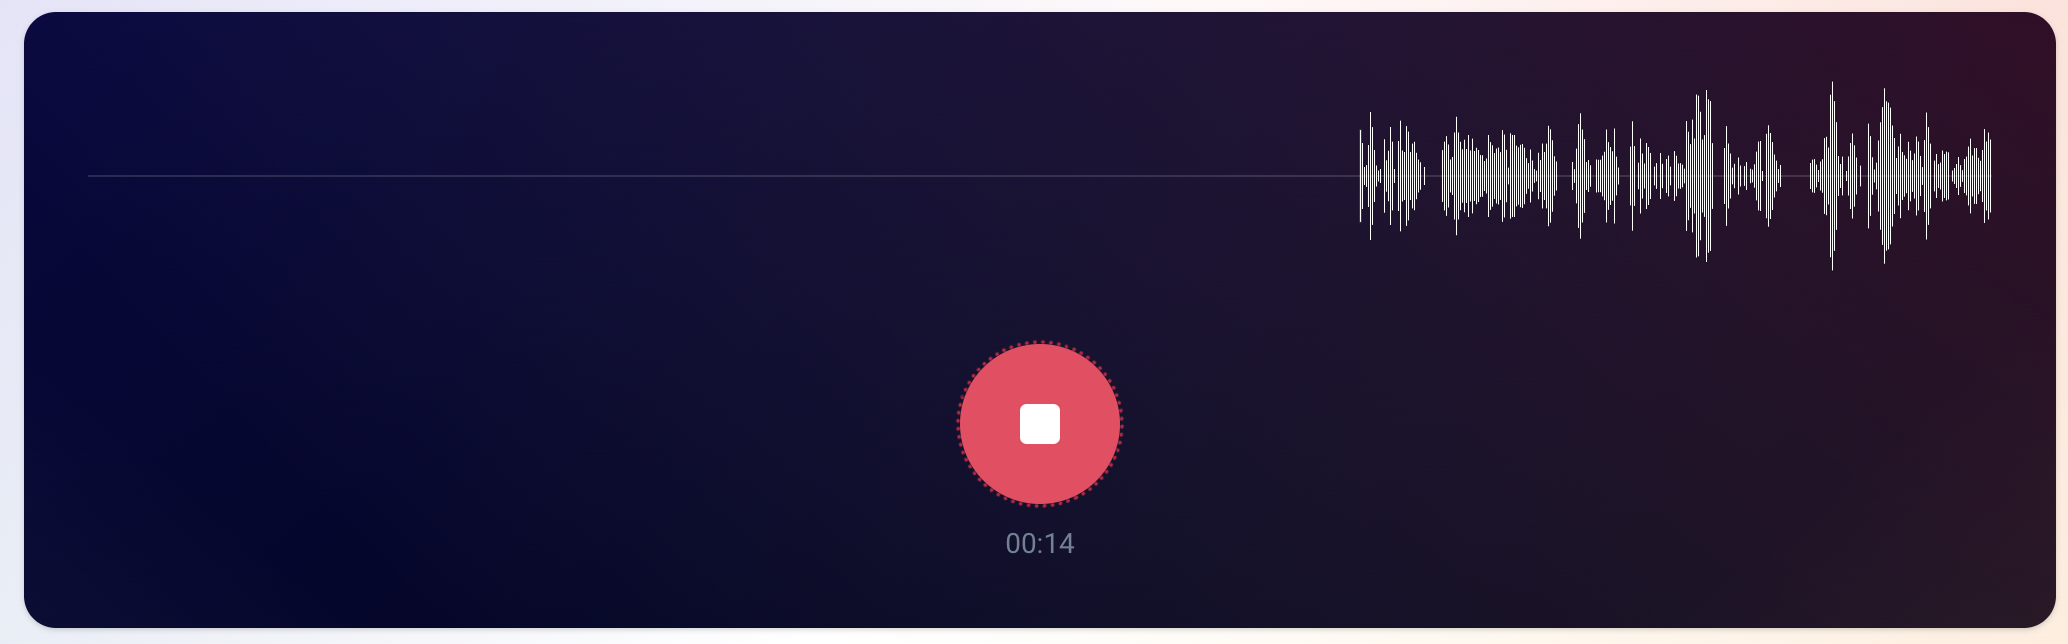
Here you can see audio is being captured
If you have a slightly more complex set up, such as an audio interface connected, or an external microphone, you might notice that the audio isn't initially picked up, and you see an error message to let you know there's no signal being detected.
In this case, you'll need to select the correct input device before continuing - you can do this in the Advanced Settings menu, at the top of the screen.
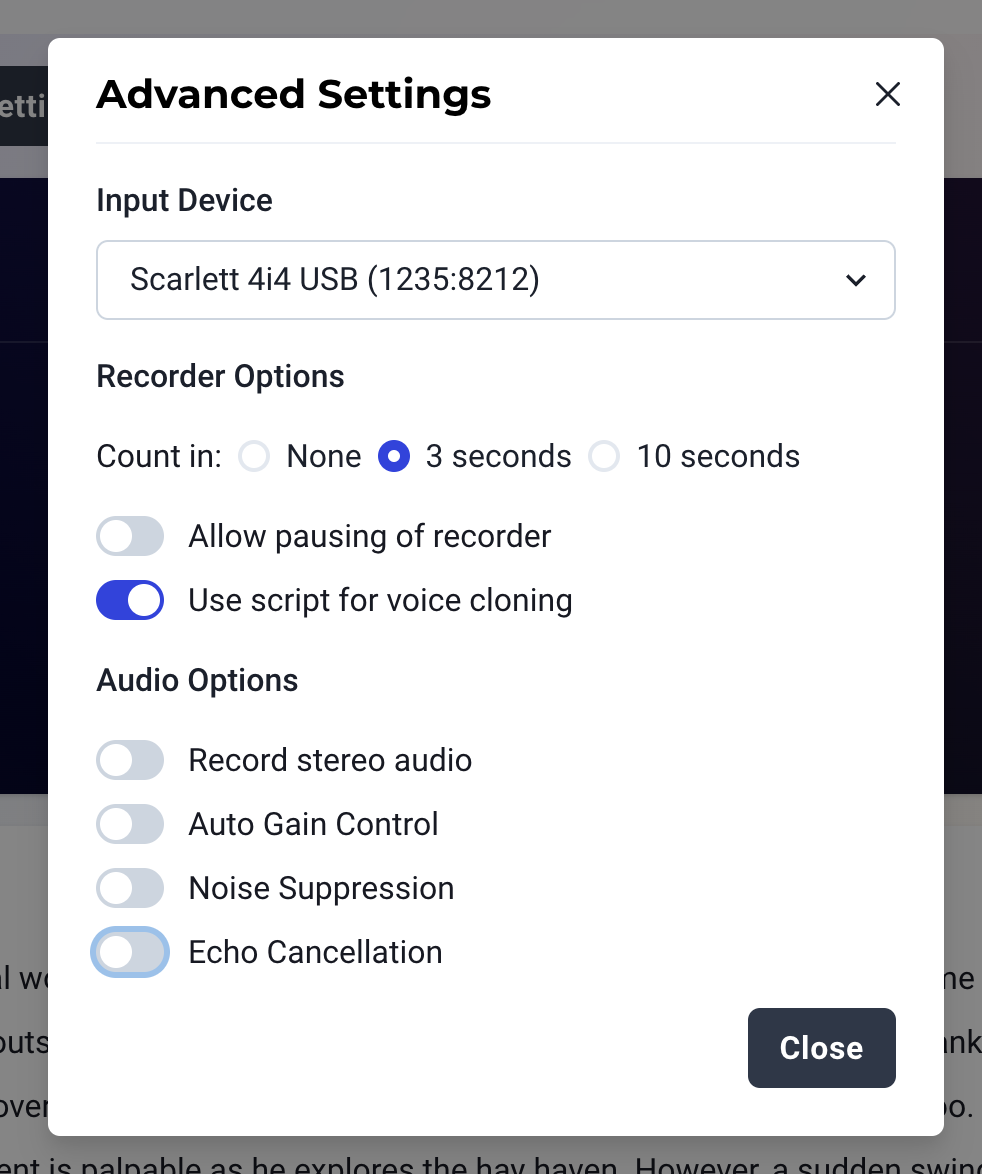
Here, you can see that we're able to select an appropriate input device (such as an audio interface) and control more advanced recording settings.
Audio Quality Warning
If you are using a quality recording set up (e.g. a professional quality microphone and interface in a quiet room), your recording might sound better with Auto Gain Control, Noise Suppression and Echo Cancellation turned off. These settings are designed to improve audio quality for more casual recording environments.
Once you've made sure a signal is being captured from your microphone, you can start recording!
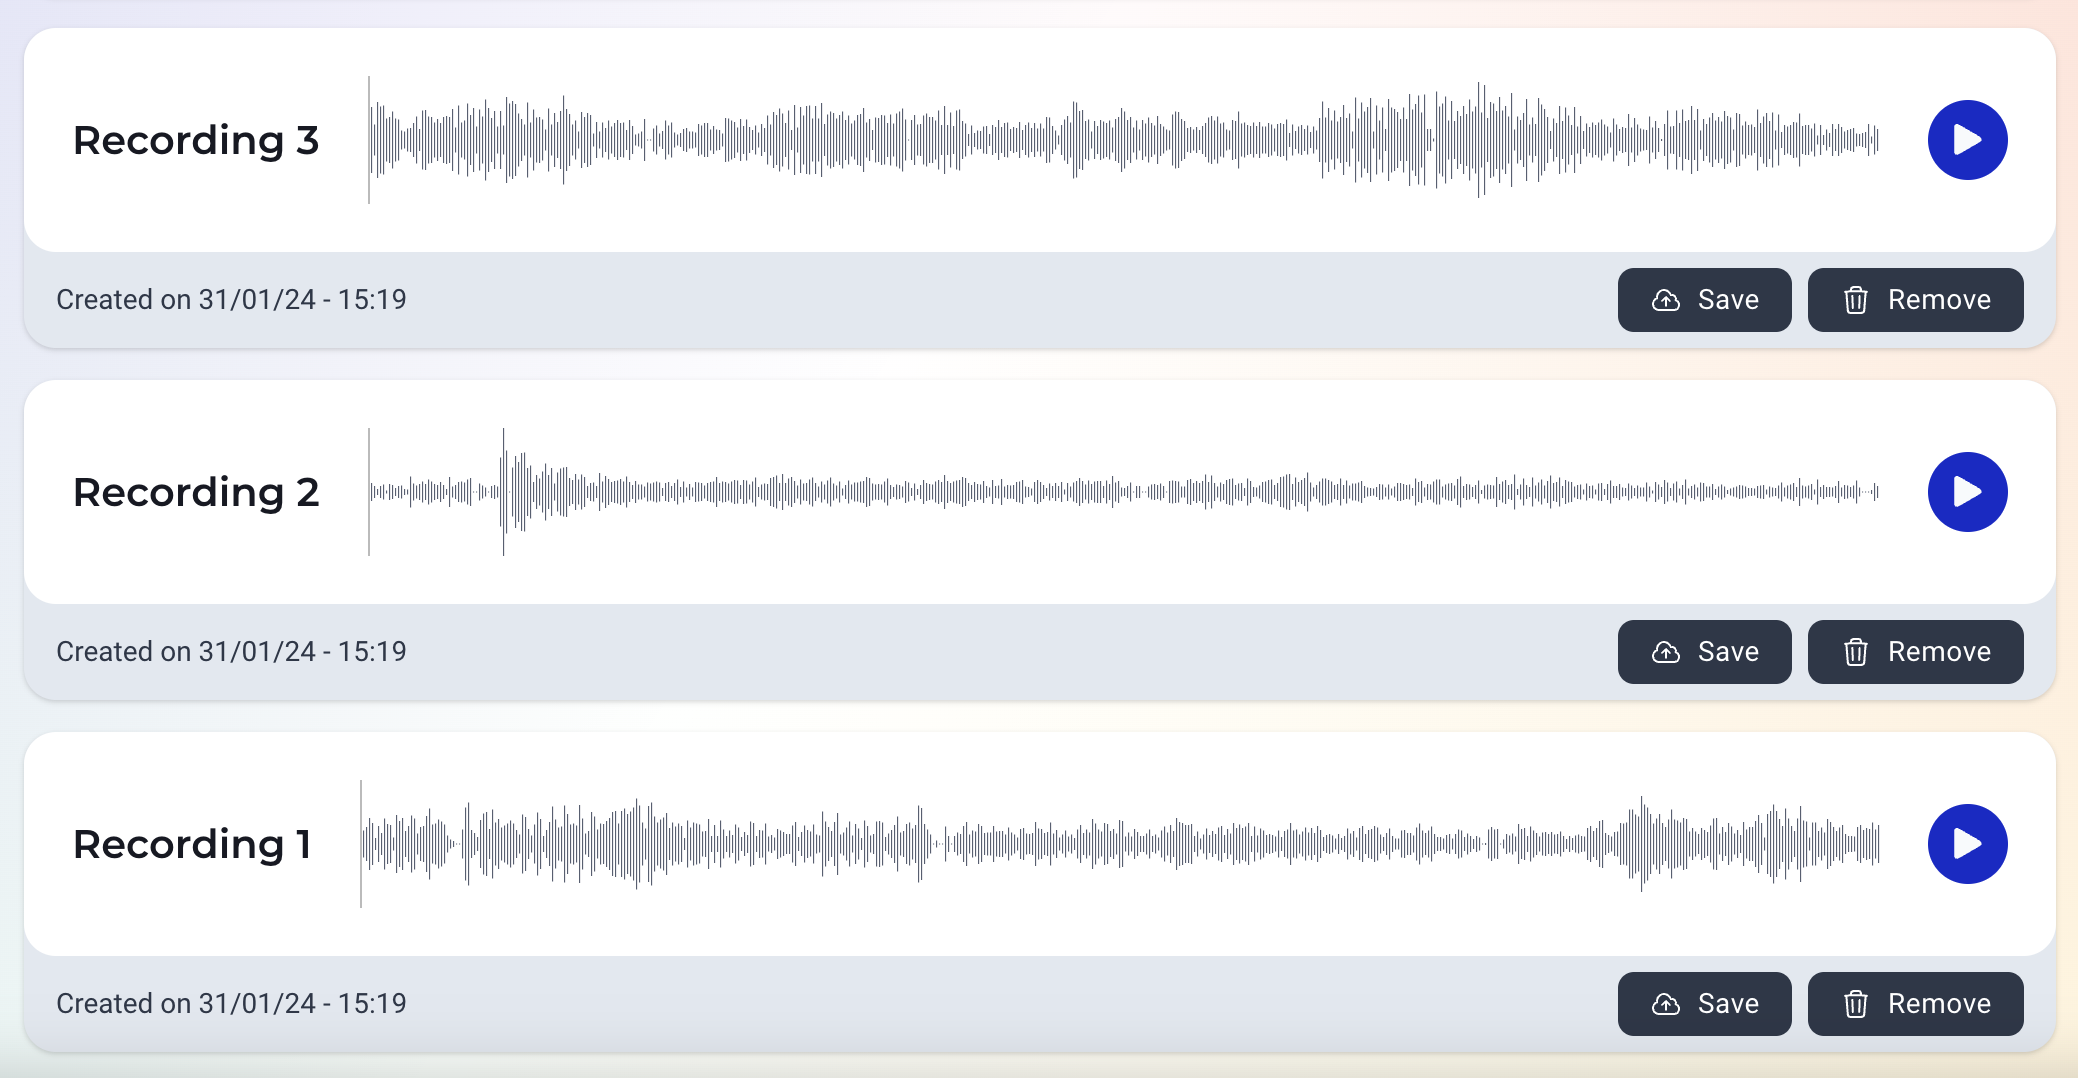
We recommend recording a few 'takes' or different versions to make sure you get the best quality. You don't need to do anything special to capture multiple takes - every time you stop a recording and press record again, a new recording will begin.
When you've captured your recording(s), these will appear at the bottom of the screen:
Don't forget to save your recordings to Files
Once you've captured your recordings, you need to save the takes you want to keep to Files in order to keep them and use them in your projects, using the
Savebutton to the right of the file preview at the bottom of the screen.
Once you save your recording, you'll then be able to either evaluate your file to check its quality, or to generate a voice clone based on the file.
Note that all files recorded or uploaded can be viewed by anyone in your organisation
If you want to restrict access to certain users for sensitive content, you can create a "child" organisation to restrict the access to certain users in your team.
Recording Booth assumes that recorded files are voice recordings by default
If you'd like to change the recording type (e.g. to sound effect), you can do this from the Resources/ Content area after uploading.
🤓 Top Tips for a High Quality Recording
There's a big range of things you can do to reduce problems with audio recordings. It's almost always easier to prevent problems in the recording than to try to correct them afterwards.
- We recommend turning on the script option in the Advanced Settings menu if you're not sure what to read to get a high quality voice clone - these scripts have been designed by AI experts to get the best possible voice cloning results in each available language.
- Record in a quiet environment to minimise background noise.
- Enunciate words clearly and maintain a consistent volume and distance from the microphone.
- Position the microphone close to the speaker's mouth (but not so close that the audio
clips: Recording Booth will warn you if this is happening. - Avoid recording in an echoey room with lots of hard surfaces. Pick somewhere small and cozy with lots of soft furnishings - wardrobes often work well!
- Do a short test before the actual recording to make sure everything sounds okay when you play it back. You can also check your test audio quality by saving it to your
Filesand then choosing toEvaluateyour audio. This will warn you of any issues identified. - Use a pop filter. This is a small mesh screen you can place in front of the microphone to reduce the risk of certain sounds (such as "p" and "b") causing clipping. They are fairly inexpensive and widely available from online retailers.(💲)
- If your microphone or interface has controllable input levels, aim to set your levels so that you're staying around the top end of the "green" range.
- Use a decent microphone (generally condenser microphones pick up greater detail for vocal recordings) for better sound quality (💲💲💲), or consider renting a studio environment for an hour if you're on a budget. (💲💲)
Updated 9 days ago